Category Archives: EMail / POP3 / IMAP Help

Domain Email Set Up on Windows 10 (Default Mail App)

To set your domain emails up using the default Windows 10 Mail app follow the instructions below.

Important: make sure you have your email address and password to hand before you begin. You are advised to check these are correct by logging into webmail first via a web browser.

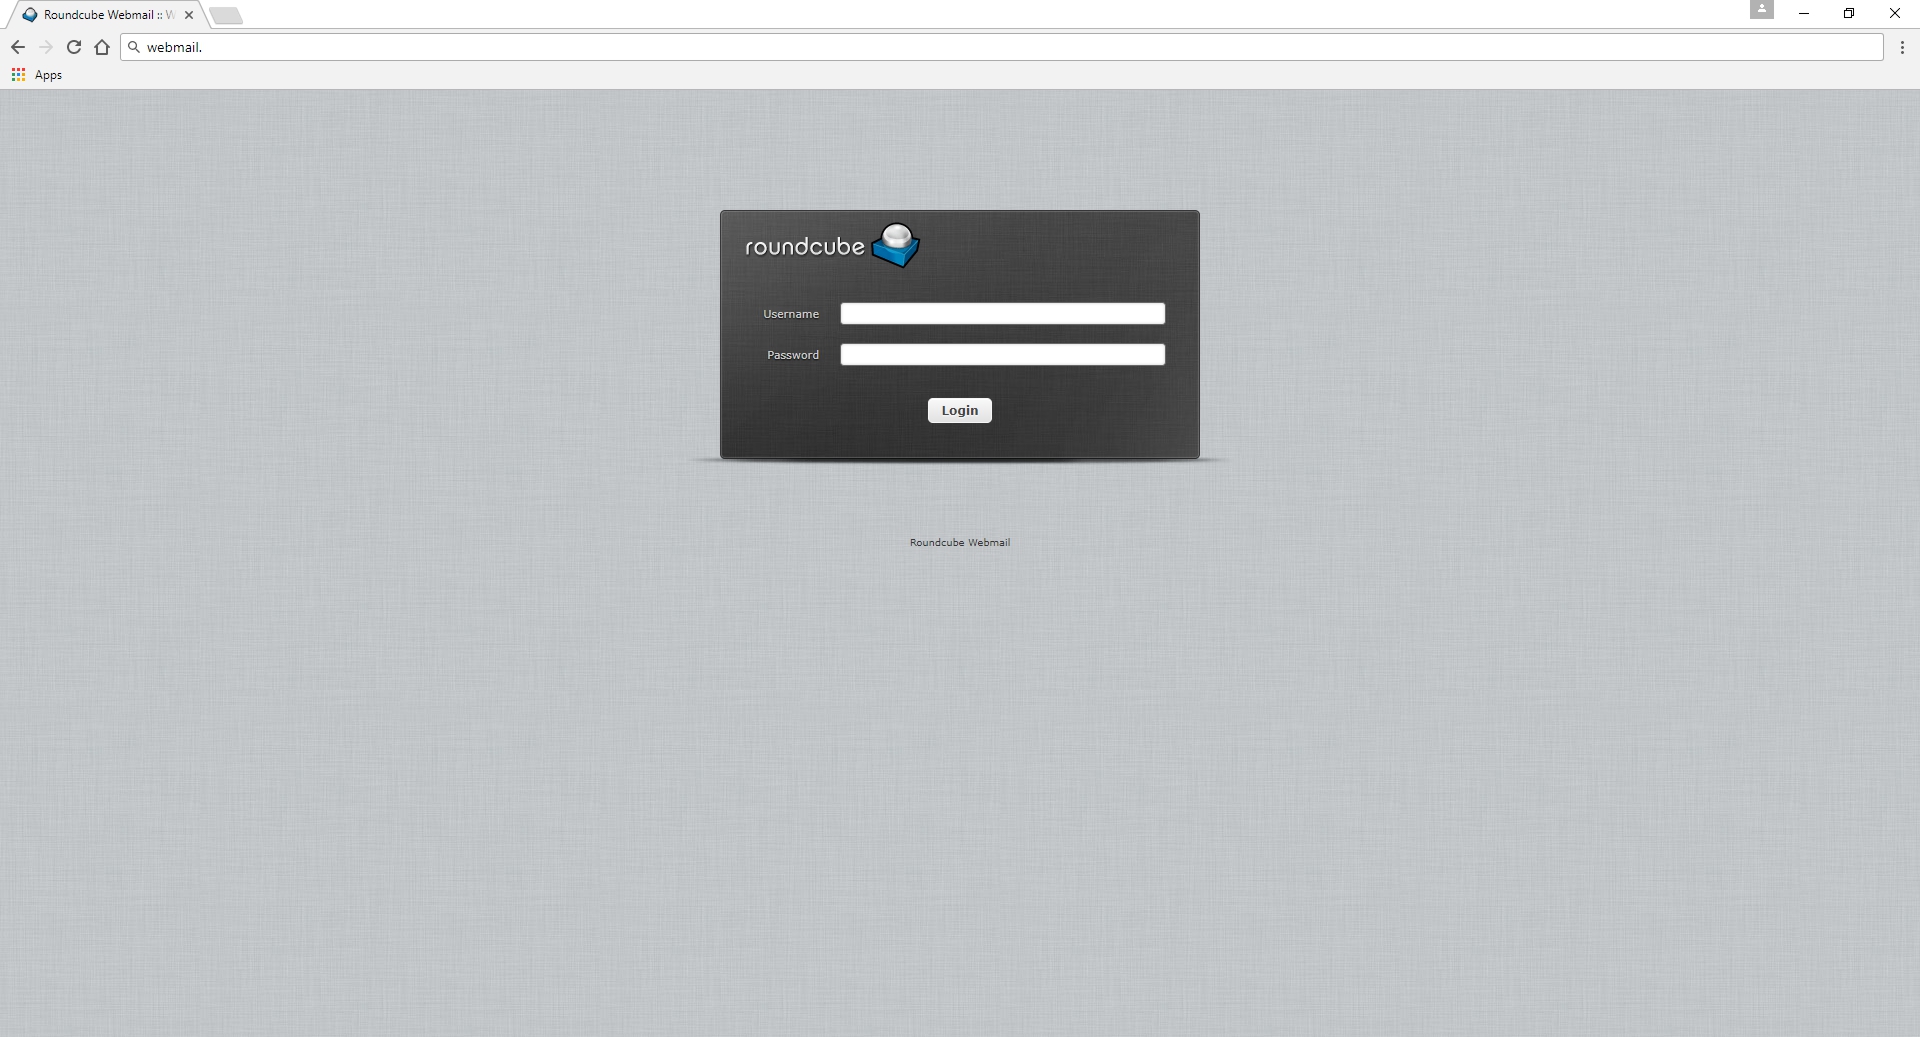
Go to: https://webmail.webmailhost.co.uk and log in with your full email address and password. If you have logged in successfully, you can be assured your log in details are correct. Log out. If not, contact us to reset your password.

Begin set Up:

Press the windows icon (bottom left corner) > Mail > Accounts > + Add Account > Advanced Set Up > Internet Email > Internet Email Account (in the window fill in all fields as follows):

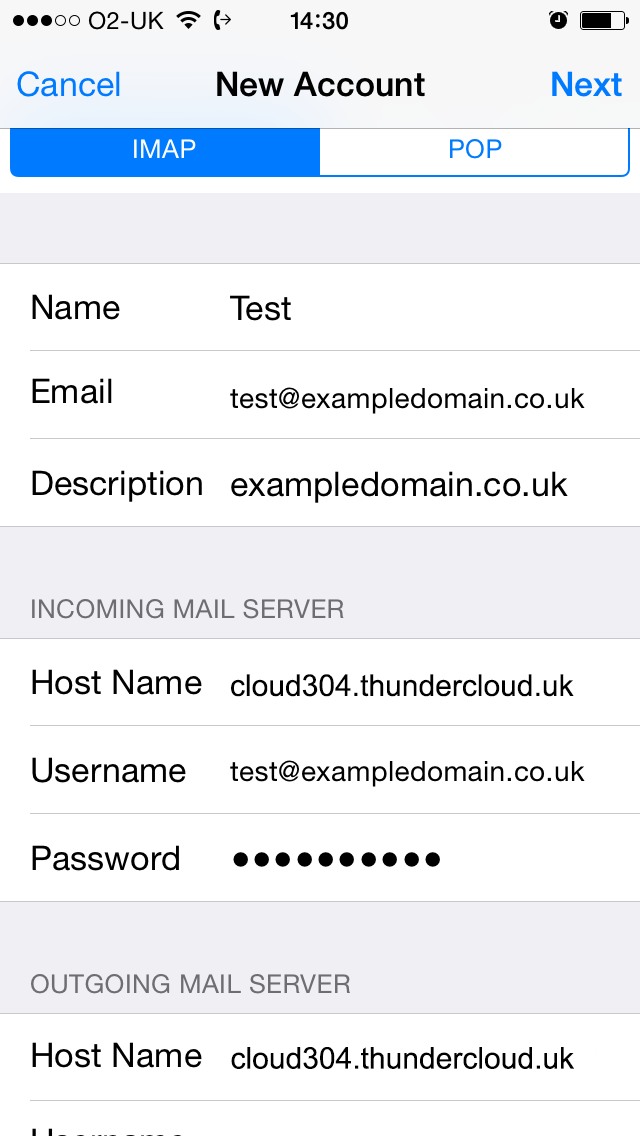
Email Address: your full email address

Username: your full email address

Password: xxxxxx

Account name: your name, company name or full email address

Send your messages using this name: type in your personal name or company name (the recipient will see this so choose something relevant that they will recognise you by)

Incoming Mail Server: cloud304.thundercloud.uk
Account Type: POP3 or IMAP4 (*see below)
Outgoing Mail Server: cloud304.thundercloud.uk

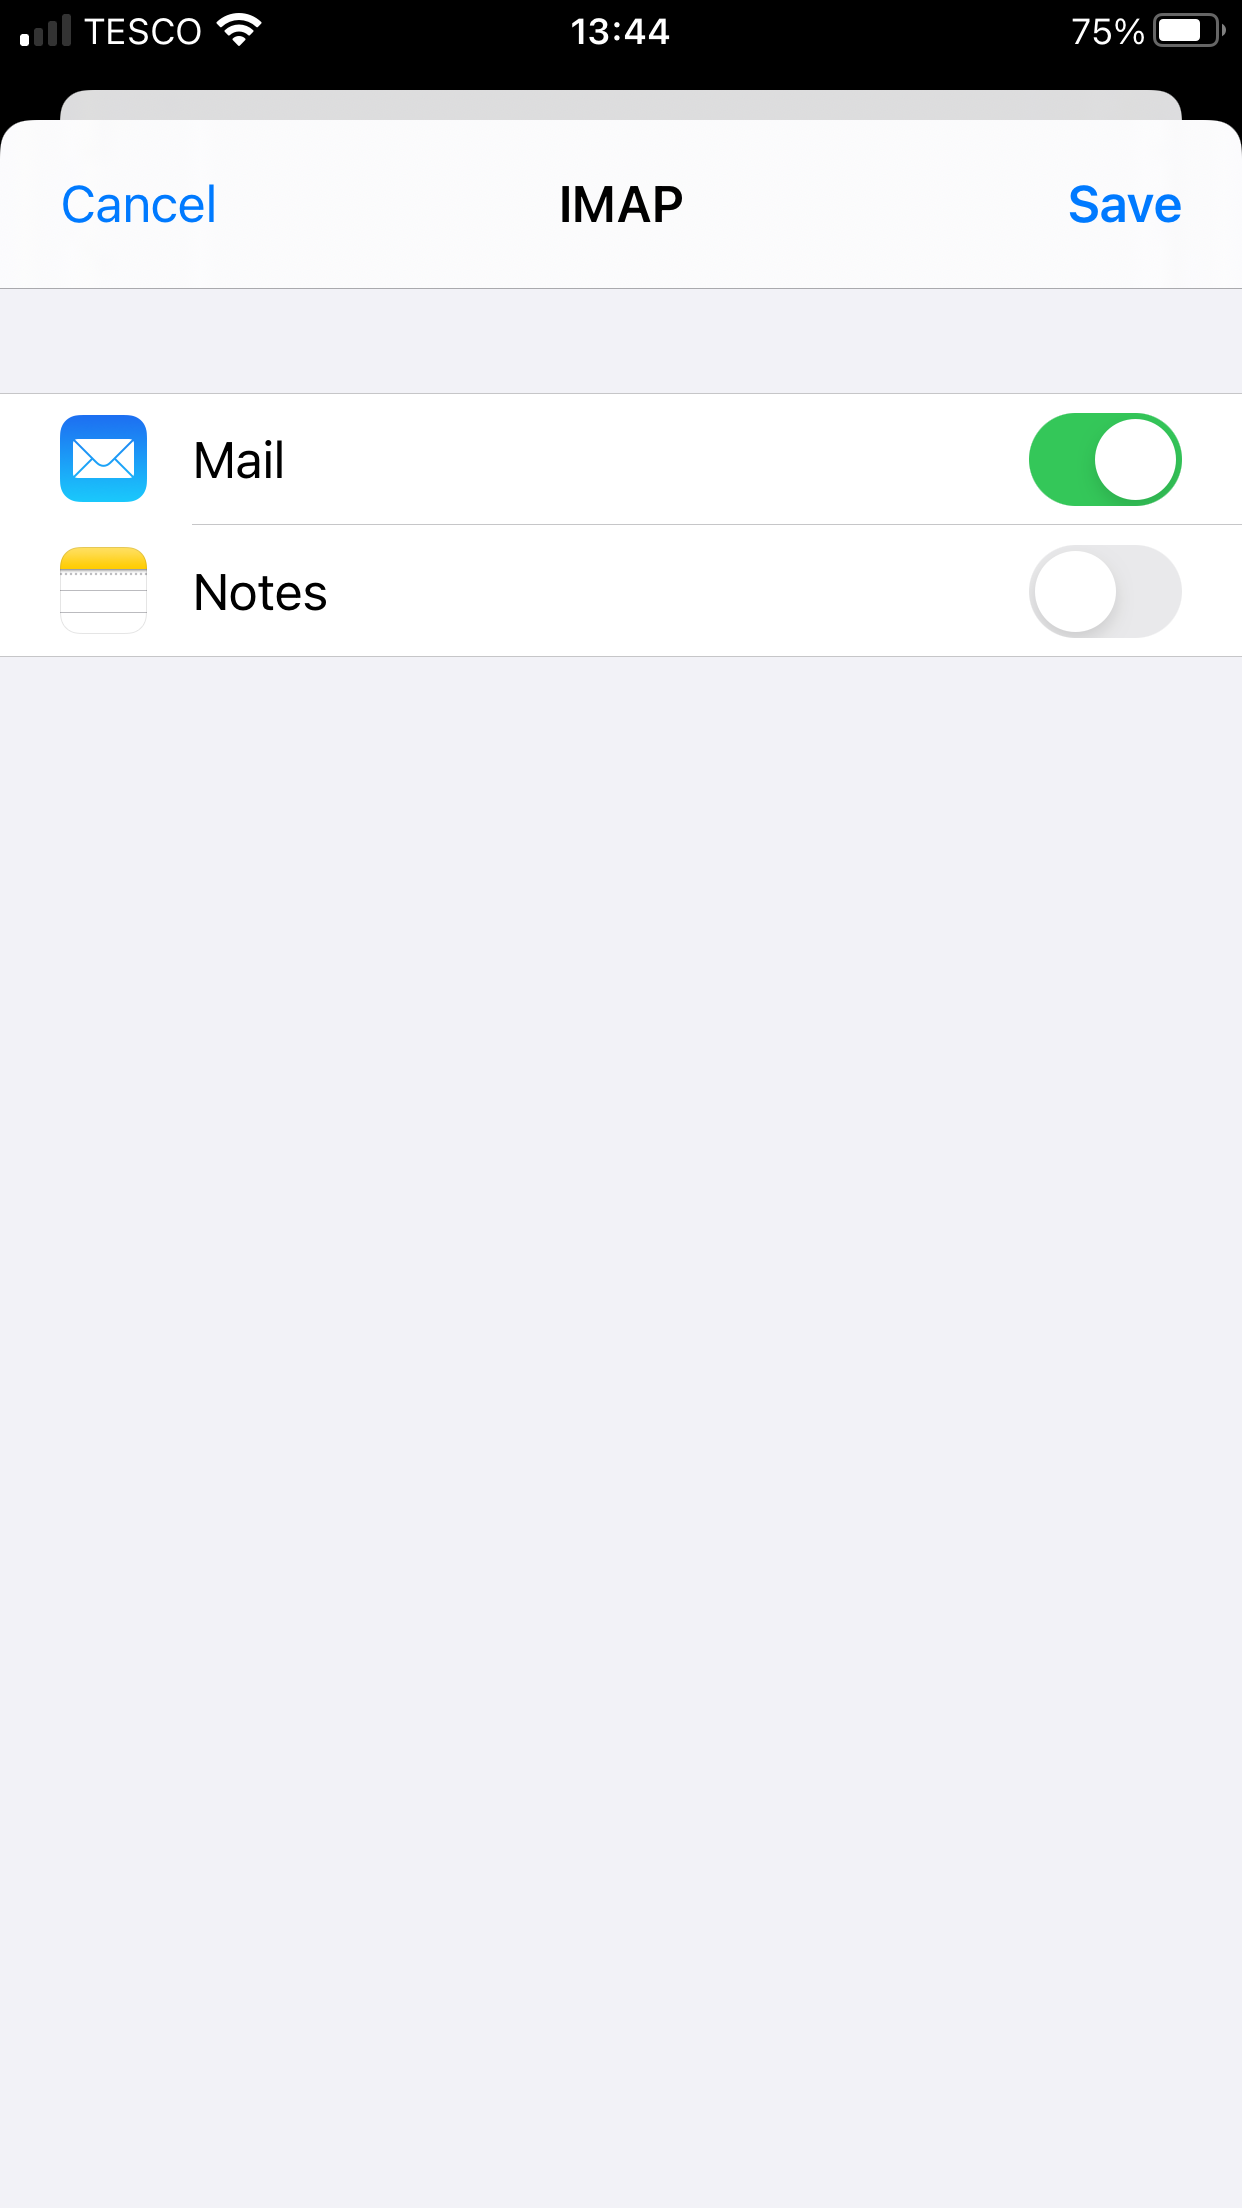
Make sure ALL 4 boxes are checked underneath > Sign In

You can personalise your email signature, set when your pc checks for mail etc by opening up the mail program and clicking on the settings gearwheel (last icon from the bottom left menu bar)

*POP3 downloads all emails onto the device you are using, leaving no copy on the server. You cannot sync across devices. Useful if you only use one device.

IMAP4 – retrieves a copy of an email to your device leaving the original on the server. You can sync using the same mail app on multiple devices. If you accidentally delete an email from your device, you will be able to recover the original from the server. Although each client has 5GB space within each mailbox, you will need to log in via webmail periodically to clear out any junk or old emails no longer require to stop it getting full and exceeding its capacity.

We would always recommend you opt for IMAP4 when setting up domain emails on a mail client/mail app.

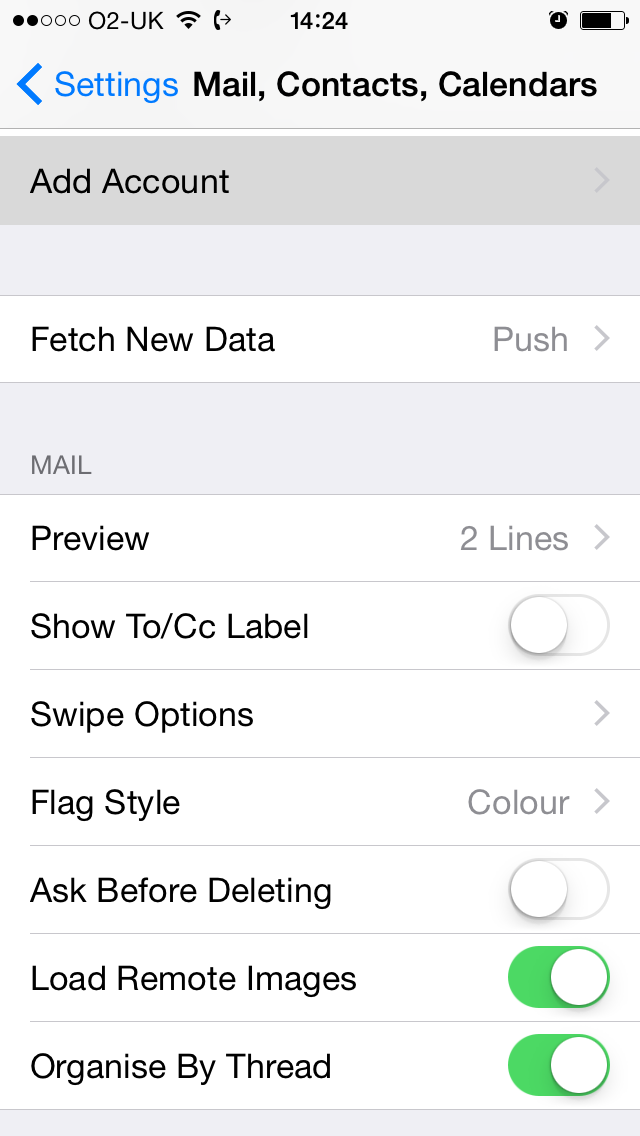
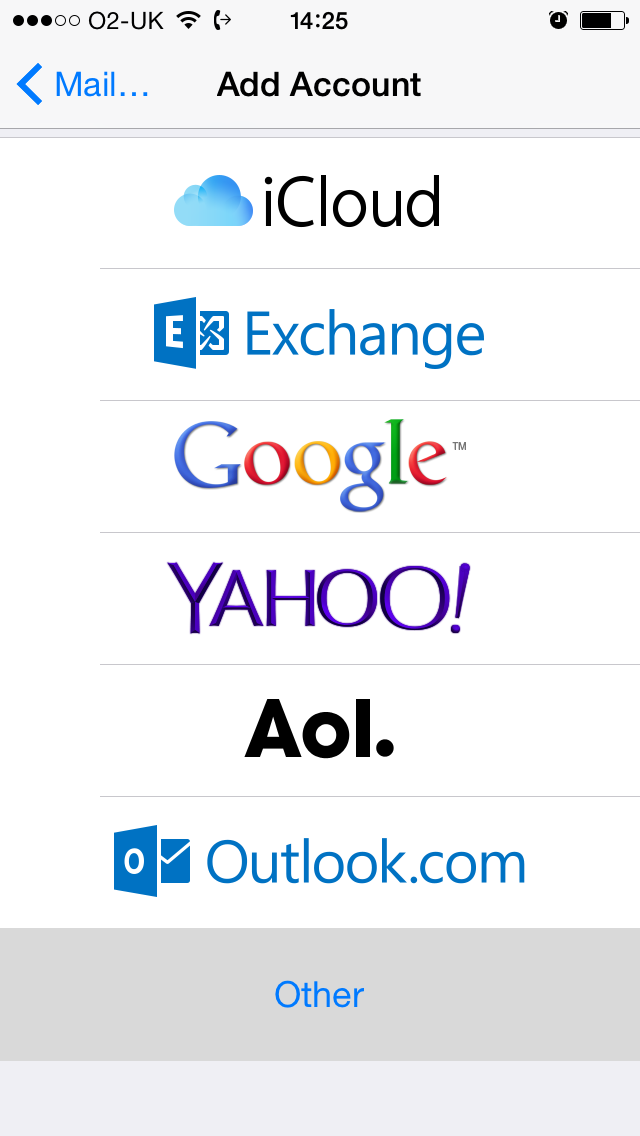
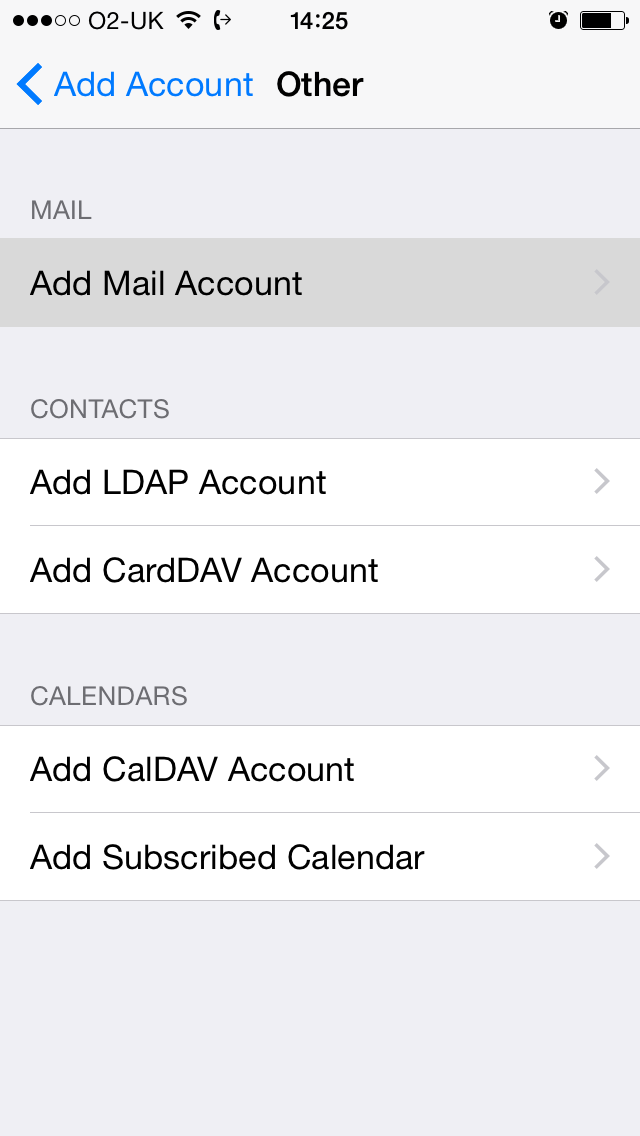
You can also add your domain emails to your phone to sync with the account you created above.

Setting up Outlook on an iphone

If you open your windows 10 mail client, you will see a link ‘Get emails on your phone’ bottom left corner. Click it and either scan the QR code or enter your phone number and you will receive a link to download the app on your phone.

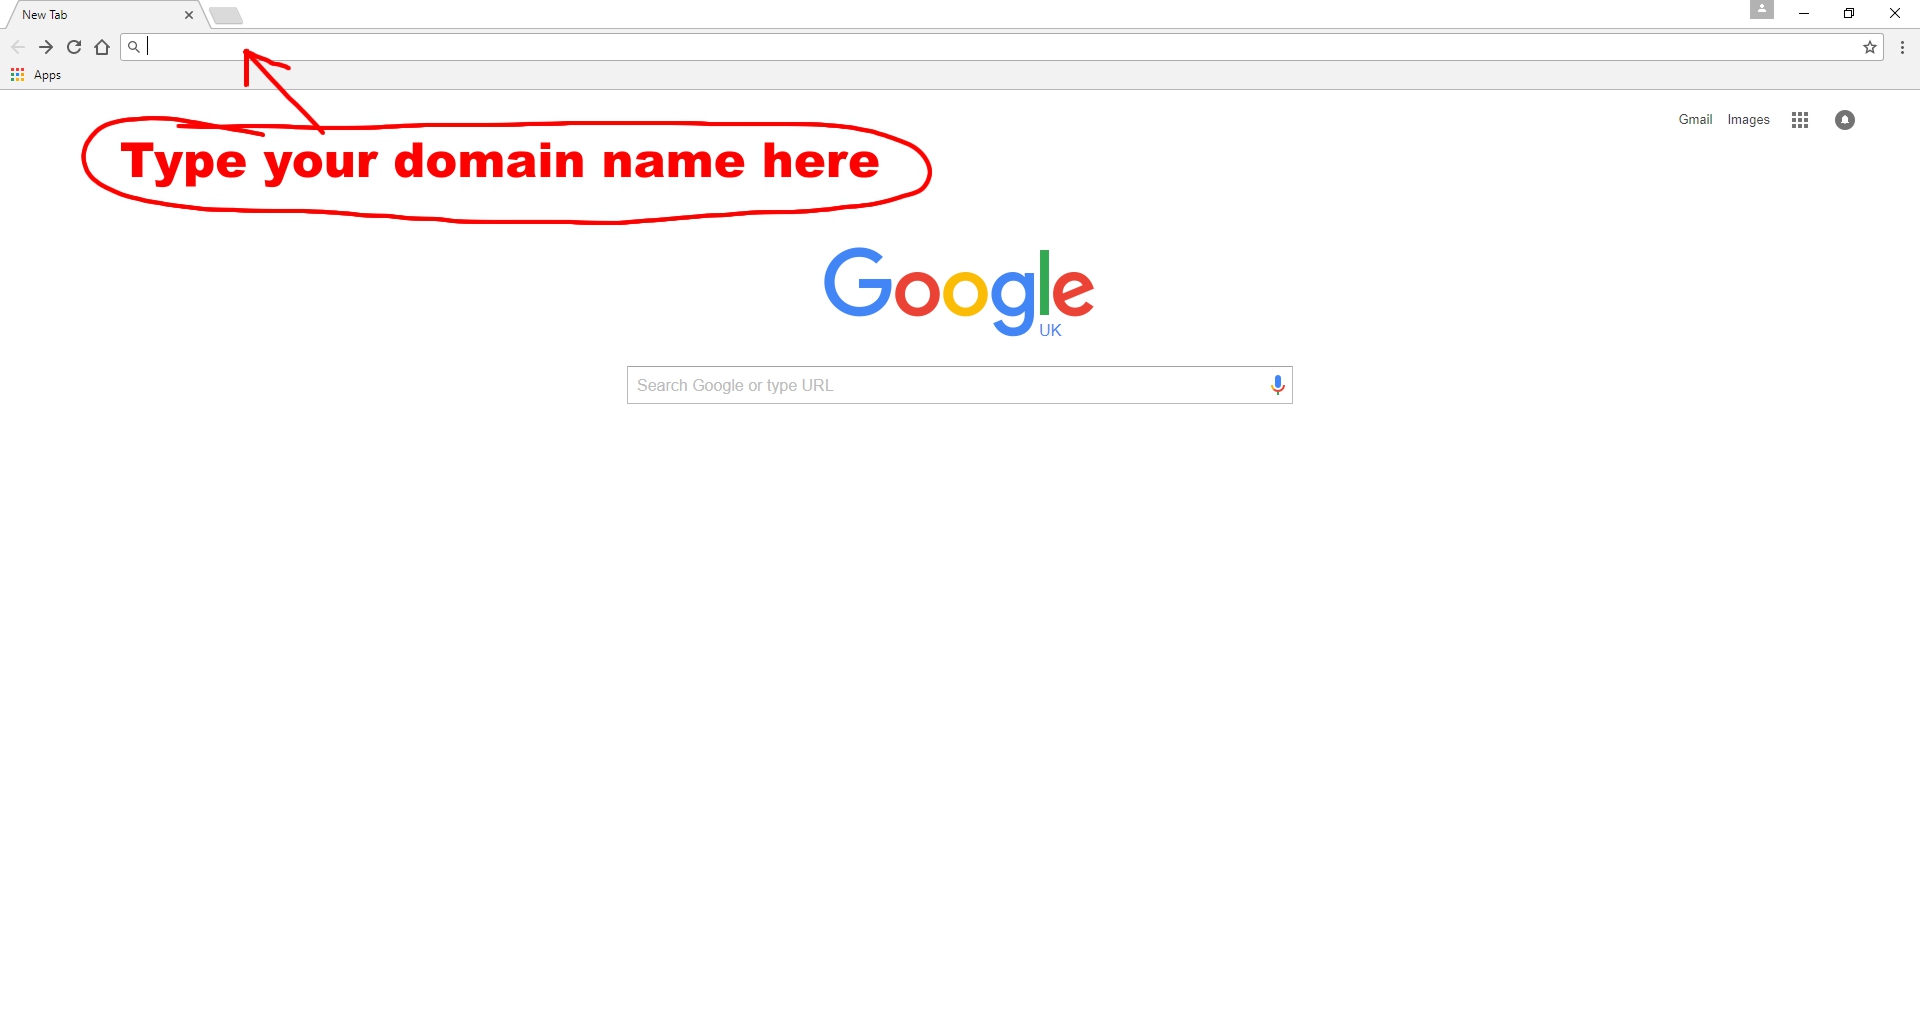
Please note, where I have used you@yourdomain.co.uk or mail.yourdomain.co.uk below – you must replace this with your own email address and domain.

Once downloaded, open the Outlook icon to begin set up. Click Add Account.

Enter your full email address & click the blue ‘Add Account’ button
Make sure it says IMAP at the top.

You need to complete the following fields that the program hasn’t autofilled:

Password
Display Name:
Description:

Then toggle the ‘Used Advanced Settings’ to enable
Incoming hostname:

mail.yourdomain.co.uk:993
IMAP username: you@yourdomain.co.uk
IMAP password: (complete this)

SMTP Outgoing Email Server
SMTP Hostname: mail.yourdomain.co.uk:465
SMTP Username: you@yourdomain.co.uk
SMTP Password: (your password)

Then click the ‘Sign in’ Button to complete

DOMAIN E-mail Set Up (imap) ON iPhones (updated for 2024)

To set up your domain e-mail account on your iPhone default mail app (IOS 14.4 onwards), please follow the steps below.

Make sure you know your domain email address AND password before you begin, to avoid any connectivity problems.

You will be using the default mail app (blue icon) to send and receive your mail.   Click settings gearwheel to start…

  1. Click Mail icon > Accounts. > Add Account > Other > Add Mail Account > New Account (fill in 4 fields with your details)

2.  New Account details  – LEAVE THE TOP TOGGLE ON IMAP!  Incoming Mail Server –  fill in the hostname: yourdomain.co.uk then username (which is your full email address) 

 Outgoing Mail Server –  hostname: yourdomain.co.uk your username and password (it is NOT optional) > NEXT


3. make sure the mail toggle is enabled (green) > SAVE

4. Your email account is now ready.  Press your home button, find your blue mail app icon and move somewhere convenient.  Tap on it to open your mail.

Final step, make sure sent emails are stored on both your iPhone AND the server

By default, iPhone selects not to store sent items on the server.  I have personally not encountered this but, it is always best to check to make sure any domain emails sent using your iphone are later available to view both on your iphone and on the server to avoid any confusion, plus, if you ever lose your phone or access to it and need to access your email account via webmail, you will find everything there, fully synced.

Checking/Adding the functionality for these items to be stored on both the iPhone and the server is rather simple. 

  1. On the iPhone.
  2. Click settings.
  3. Click mail, contact, calendars.
  4. Select the mail account you want to change.
  5. Click on account info.
  6. Scroll down to advanced.
  7. You will now see a screen that says “Advanced”. In this screen is a section called “Mailbox Behaviours”.
  8. Click on sent – mailbox button.
  9. This will now display two sections. “On My iPhone” and “On the server”.
  10. In the section “on the server” should be a list of all your mailboxes.
  11. Scroll down to sent items on the mail server and select sent items.
  12. When you send an email from your iPhone, a copy will be passed to your mail server.
  13. Your iPhone is now configured to record sent mail both on the device and server.
 
 
*********************************
 

To set up your domain e-mail account on your iPhone default mail app (IOS 13.5 onwards), please follow the steps below.

Make sure you know your domain email address AND password before you begin, to avoid any connectivity problems.

You will be using the default mail app (blue icon) to send and receive your mail.   Click settings gearwheel to start…

  1. Click Settings (gearwheel icon) > Passwords & Accounts >Add Account > Other….

2. Add Mail Account > Complete your details in the 4 fields as marked in red (with your details) > click Next (blue link top right) >

Complete ALL fields marked in red replacing you@yourdomain.co.uk  with your own email address & password (type out in full) > Click Next (blue link top right).

3.  Your phone will now sync with the server > click SAVE to complete. Now click home & tap the blue mail app icon to open your email account.

Send an email to another account you own and send it back again to make sure you are receiving incoming mail and they are outgoing.

Final step, make sure sent emails are stored on both your iPhone AND the server

By default, iPhone selects not to store sent items on the server.  I have personally not encountered this but, it is always best to check to make sure any domain emails sent using your iphone are later available to view both on your iphone and on the server to avoid any confusion, plus, if you ever lose your phone or access to it and need to access your email account via webmail, you will find everything there, fully synced.

Checking/Adding the functionality for these items to be stored on both the iPhone and the server is rather simple. 

  1. On the iPhone.
  2. Click settings.
  3. Click mail, contact, calendars.
  4. Select the mail account you want to change.
  5. Click on account info.
  6. Scroll down to advanced.
  7. You will now see a screen that says “Advanced”. In this screen is a section called “Mailbox Behaviours”.
  8. Click on sent – mailbox button.
  9. This will now display two sections. “On My iPhone” and “On the server”.
  10. In the section “on the server” should be a list of all your mailboxes.
  11. Scroll down to sent items on the mail server and select sent items.
  12. When you send an email from your iPhone, a copy will be passed to your mail server.
  13. Your iPhone is now configured to record sent mail both on the device and server.
 
 
*********************************
 
 
Troubleshooting – Receiving but not sending? 
 
 
  1. Go to Settings > Mail > Accounts > tap on mail account affected
  2. Make sure the mail toggle by the blue envelope icon is on and showing green
  3. Tap on the account name above the toggle

Click on SMTP.

Make sure the the primary server is ON> , click on it and make sure the ‘Use SSL’ toggle is switched on (it will be green if so)

Authentication – make sure this is set to ‘password’

server port 587

If the primary server is not the same as the one you have in your outgoing mail server settings, you need to add it…

Under PRIMARY SERVER there is another option OTHER SMTP SERVERS

Click Add Server (if there is nothing there) or edit the one there. Fill in the host name, username (full email address) and password (not optional you must fill it in correctly) and click save – it will verify.

**************************


Previous versions of IOS, please follow the steps below:

1) Go to Settings > Mail, Contacts, Calendars > Add Account.

ip-0ip-1

2) Click ‘Other’ and then ‘Add Mail Account’.

ip-22ip-2

3) Fill in the details with the e-mail address and password for the account you wish to set up.  Make sure all fields are typed out in full even those marked optional.

ip-3

4) IMAP is the default choice.  Make sure all fields are typed out in full even those marked optional.  The Incoming and Outgoing mail server hostname is:  cloud304.thundercloud.uk and overtype the password field with your password. Click Next to proceed & Save to complete.

iphone set up

5)  You have now set up your domain email account on your iPhone!

ip-5

Domain Email Set Up – (IMAP) on Android

How to set up your Android mobile device with your domain email account using the IMAP protocol.

Checklist before you begin:

  1. Ensure your domain email address has been created
  2. Make sure you know your password! *

*If you are just starting out and/or you need to update your password from the default one issued, log into your Webmail first and change it. You can do this by visiting https://webmail.webmailhost.co.uk log in with your email address and default password, click settings gearwheel (far right) then ‘Password’ (left menu) update your password then Click ‘Save’ then log out. To reassure yourself it is correct, log back in and out using your new password.

Note: we prefer you to use the IMAP protocol over POP3 as IMAP syncs the messages on the mail server with multiple devices allowing you manage your domain email inbox from different locations. POP3 downloads the email directly onto the device you view it on and does not leave a copy on the server, therefore to read it again, you must use the same device.

Setting up your domain email on your Android phone.

  1. Locate and tap on the Email (envelope icon)
  2. scroll down to Settings > + Add Account
  3. Enter your full email address and password and tap NEXT
  4. tap IMAP account
  5. On the Incoming server settings screen, enter: Email address – your full domain email address, for example, you@yourdomain.co.uk
    Password – your domain email account password
    Username – your full domain email address, for example, you@yourdomain.co.uk
    IMAP server – enter: cloud304.thundercloud.uk
    Security type – select SSL (accept all certificates)
    Port – 993 > tap NEXT
  6. On the Outgoing server settings screen, enter the following information:
  7. SMTP server – enter: cloud304.thundercloud.uk
    Security type – select SSL (accept all certificates)
    Port – 465
    Require sign-in – you will need to check this box!
    Username – enter your full domain email address, for example, you@yourdomain.co.uk
    Password – enter your domain email account password, tap NEXT
  8. On the Accounts Options screen, you can select your preferred account options, including sync schedule, new email notification and more. Tap NEXT to  complete the setup process.

Your Android device is now configured to access your domain email account using the default Mail app.

Email Server Settings post-server migration 24.05.19

If you’re one of our clients using using SSL settings with your mail, you will need to replace the old server hostname:
cloud25.unlimitedwebhosting.co.uk to the new one: cloud304.thundercloud.uk

You will find these settings under the headings:

Incoming Mail Server

Outgoing Mail Server

You should not need to update any other settings including your email password. Once you change the server hostname, your mail will start running freely again. All mail sent since the migration was performed will be there waiting to come through.

Run your domain emails through gmail (SSL)

This requires set up in 2 steps – Using gmail to receive your domain email and then to send it out. 

You will need a quiet, undisturbed 10 mins to do it.  Best done from a desktop computer/laptop & to avoid any frustration, make sure you know your email password! (see right at the bottom for link to a youtube tutorial which you may find helpful)


Open up Gmail and go to Settings (gearwheel far right) > Settings > Accounts and Import >Check email from other accounts > Add an email account

Enter your full email address in the box in the window > Next > Import emails from my other account (POP3) > Next

Username: (your full email address)
Password: xxxxx
Pop Server: cloud304.thundercloud.uk Port: 995

Tick the checkbox ‘Always use a secure connection (SSL) when retrieving mail’
(the others are optional – best leave them unchecked)
Click ‘Add Account’

Gmail will connect with the server and will now ask. Would you like to be able to SEND MAIL from your domain email account using gmail. Make sure ‘Yes’, is selected, click NEXT

Enter your Business Name in the Name Box (this is so people you send to can see who it’s from). Then click ‘Next Step’

SMTP Server: cloud304.thundercloud.uk Port: 465
Username: (your full email address)
Password: xxxxx

Check the option: Secured connection using SSL (recommended)

(Make sure the port number is 465)

then click ‘Add Account’


Gmail will now send a confirmation code to your domain email to verify the set up.  (leave this window open)

If your Roundcube webmail is open, you can get the confirmation code from there and paste it into the window (that you just left open) to confirm (click verify)

If the email with the code is not showing in webmail, it may already have been imported into your gmail account so check the inbox there.


Once you have successfully entered the code and clicked verify, your domain email is now fully up and running through Gmail, so go to your inbox to check your mail. 

Use the gmail app for access on multiple devices.

There is a step by step visual instruction on YouTube which you may like to watch first: https://www.youtube.com/watch?v=ynpDaY6noMk There may be a very slight variation due to the gmail being a previous version and of course you need to use your own settings (above) but you should still find this visual instruction very helpful.

Email settings for Outlook and other email clients – including SSL

To setup your Email client such as Outlook, Thunderbird and so on you will need the mail settings as below:

For IMAP

Account type: IMAP
Incoming mail server: mail.domain.co.uk (using your actual domain name)
Port 143

Username:  (your full email address)
Password:  (your email account password)

For SSL use –
Incoming mail server: cloud304.thundercloud.uk
Port :993

For POP3

Account type: POP3
Incoming mail server: mail.domain.co.uk (using your actual domain name)
Port 110

For SSL use –
Incoming mail server: cloud304.thundercloud.uk
Port :995

Outgoing mail server: cloud304.thundercloud.uk
Port 25025

User/pass: as above

For SSL use –
Outgoing mail server: cloud304.thundercloud.uk
Port 465

Please make sure you enable outbound authentication if using Outlook. This will use the same credentials as your incoming server.

Update your Domain Email account settings in Gmail

To update your domain email settings within gmail, you can do this quickly by accessing the settings pages within your gmail account you can find current step by step instructions for your desktop/laptop, android or iphone/ipad by visitng the Gmail help centre here:

https://support.google.com/mail/answer/6562

For SSL customers, you can find step by step instruction from a desktop here: PDF

email Settings for 3rd Party Programs (Outlook etc)

To setup your Email client such as Outlook, Thunderbird and so on you will need the mail settings as below:

For IMAP

Account type: IMAP

Incoming mail server: mail.domain.com (use your own actual domain name)

Port 143

Username: Full email address

Password: mail account password

For SSL use –

Incoming mail server – cloud304.thundercloud.uk

Port :993

For POP3

Incoming mail server: as above

Port 110

User/pass: as above

For SSL use –

Incoming mail server – cloud304.thundercloud.uk

Port :995

Outgoing mail server: as above

Port 25 (you can try port 25025 if you have issues sending)

User/pass: as above

For SSL use –

Outgoing mail server – cloud304.thundercloud.uk

Port :465

Please make sure you enable outbound authentication if using Outlook. This will use the same credentials as your incoming server.

Accessing Webmail via your Web Browser

Troubleshooting

2 common mistakes some people make when  trying to access their email via a web browser is:

1: typing in the wrong address and;

2: typing their webmail address into the wrong area.

Firstly, your webmail address is simply:

webmail.yourdomain.co.uk  (replacing yourdomain with your actual domain)

Secondly, you need to type this webmail address into the address line at the very top of your browser as depicted below (NOT in the search area – centre screen):

Browser ScreenshotThen, the Roundcube log in Dashboard will appear and you can log in with your email address and password (looks like this):

Roundcube Log in

Setting Up Webmail – Your identity and email signature

Customising your Roundcube Webmail inbox is quite straightforward.  Here’s how in 3 steps:

1. Log into your webmail account:

https://webmail.(yourdomain).co.uk    >  Enter your username and password

2. Click the ‘settings’ gearwheel icon (left menu)

First, set up your identity.  From the left menu, choose: Identities > and click on your email address (next column).

Complete the top section:

Display Name
This is the name that will appear in your recipients inbox, so make sure they can clearly identify you by this (e.g. mine is ‘Rachael, Websorceress’)

Organization
Put your company name in this field. The other two fields can be left blank.

3. Complete the Signature Section

You can just enter ordinary text in here or if you want to customise your signature, then ‘check’ the HTML signature box.  A little interface will appear where you can upload a logo, pick a font, change colours and add links etc. I would recommend you use a logo size of approx 150px wide so there is no issue with people viewing on smaller devices and mobile phones.

Once you’re happy it’s complete, click the ‘Save’ button

To finish, click the ‘Mail’ icon (top right) to take you back to your inbox where you can now log out.

Your identity and email signature is now set up.